This article is from ECHO Asia Note 43

[Editor’s Note: Dr. Bates is a longtime friend and partner of ECHO, and has served the greater network in a variety of ways over the years, including research collaboration, consultation, and technical writing. The contents of this article are a result of Dr. Bates involvement in a USAID agricultural development project in Cambodia, supported by the Feed the Future Innovation Lab for Collaborative Research on Sustainable Intensification (SIIL).]
The Challenges of Rainy Season Tomato Production
Tomatoes are difficult to grow during Southeast Asia’s hot and humid monsoonal rainy season. A combination of waterlogged soils, increased disease pressure, and high temperatures often kill young tomato transplants or significantly reduce yields. As an introduced crop, originally from South America, tomatoes are not well adapted to all Southeast Asian climates and soils, and can struggle to produce in the wetter conditions of the region.
Many of the tomatoes found in the marketplace and used by restaurants and hotels during the rainy season are imported or greenhouse-grown, commanding a premium price. This provides a unique opportunity for any local farmers capable of successfully producing to markets during this ‘off season’ window. While growing tomatoes on raised beds or in rain shelters is becoming common practice, grafting is an additional tool that can be used by farmers to produce tomatoes with an improved profit margin.
Terms & Definitions
Cambium Layer- Region of the stem where the vascular system is made. During grafting, this layer must be lined up between the scion and the rootstock so that vascular systems can reattach to each other.
Graft Union- The point at which the scion and rootstock have been joined, whereby a vascular connection is made.
Rootstock- The lower, or underground portion of the graft. Often selected for its adaptability to local soil and growing conditions (e.g. flooded soils).
Scion- The upper portion of the plant containing the desired genes, or characteristics for production (e.g. fruit size, shape, taste, disease resistance, etc…)
Vascular System- A collection of plant tissues necessary for
transporting water and nutrients between roots and leaves.
Grafting Tomato onto Locally Adapted Eggplant Rootstock
By grafting market-demanded tomato scions onto selected rootstocks of eggplant (Figure 1), a crop native to Asia, we can leverage eggplant’s resistance to flooding, bacterial wilt, fusarium wilt, and root knot nematodes. In the end, grafted plants will combine beneficial traits from both the scion and rootstock plants. The process remains affordable and the know-how required is minimal, making it a beneficial option for farms of any scale.
Note that tomato (Solanum lycopersicum) and eggplant (Solanum melongena) are members of the same botanical family, Solanaceae, making them compatible with each other. Tomato are graft compatible with other varieties of tomato, as well as other species within this family, providing diverse grafting potential.
Successfully Grafting Tomato Plants Involves 3 Major Stages:
- Pre-graft: the grafting site, tools and supplies, and healthy scion and rootstock seedlings prepared and assembled
- Grafting of the scion and rootstock seedlings
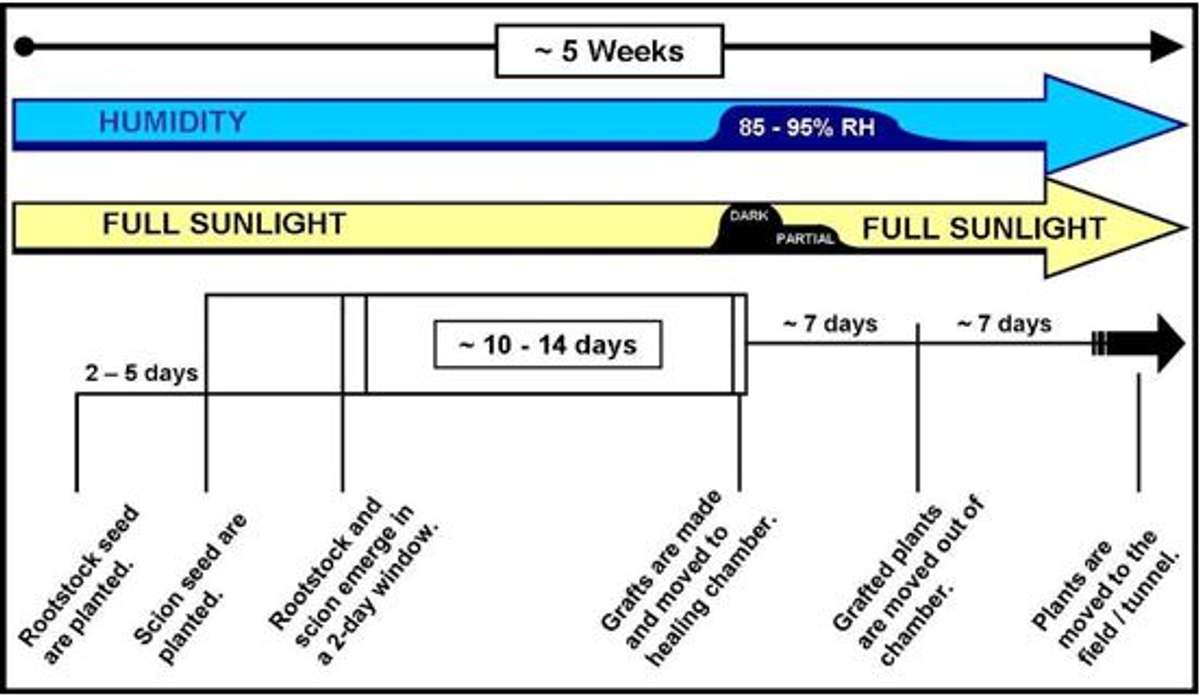
- Post-graft: the grafted plants are permitted to heal prior to planting in the field. The entire process, from seed sowing to field planting usually takes approximately 5 weeks (Figure 2).
This article introduces basic techniques of cleft grafting, drawing from experiences with smallholder farmers in Cambodia.
Scion and Rootstock Seedling Preparation
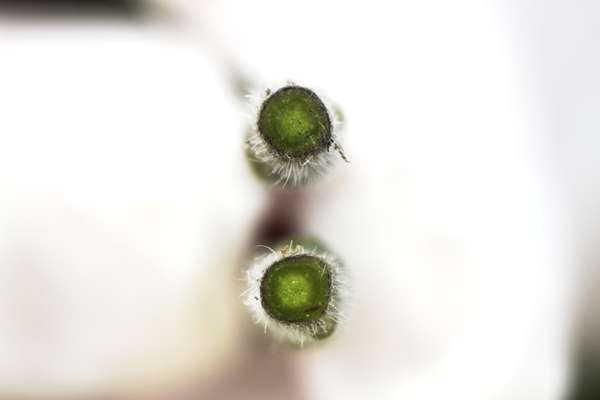
For a successful graft union to form, the cambium of the rootstock and scion must be well aligned and in contact with one another. The scion and rootstock plants must therefore have similar stem diameters at the time of grafting (Figure 4). However, the scion and rootstock may not germinate or grow at the same rate. Conduct a preliminary trial to determine the growth rates of rootstock and scion plants in your growing environment. Based on the results, seed both scion and rootstock varieties so that they are ready for grafting in 14–21 days. In our experience grafting tomato scions onto eggplant rootstock, seeding the eggplant 2-4 days prior to the tomato yielded similar stem diameters. Seed more plants than necessary so that you have a greater selection for matching stem diameters. It is rare to get 100% graft survival, so it is always recommended to graft additional plants to account for some graft failure.
The Grafting Procedure
Two common methods for grafting tomato onto eggplant rootstock are the cleft graft, and splice graft. A grafting method can be chosen based on the stem diameters of scion and rootstock seedlings. Splice grafting requires rootstock and scion stem diameters to be nearly identical. Cleft grafting tends to allow slightly greater variance in rootstock and scion stem diameters. Therefore, cleft grafting may be ideal for new grafters or when rootstock and scion seedling size differences are great. Also, the location of the graft on the stem of the scion can be adjusted to obtain the closest match with the rootstock stem diameter where the rootstock cut was made. For our tomato grafting work in Cambodia we used the cleft graft exclusively, with good results. A cleft graft of a market-demanded tomato variety grafted onto a disease-resistant tomato rootstock is illustrated below.
Most all grafts, including the cleft graft shown here, have three basic steps:
- Preparation of the rootstock
- Preparation of the scion
- Joining together the scion and rootstock.
[Editors’ note: All images Figures 3-13 credited to Ohio State University Extension.]
Preparation of the Rootstock
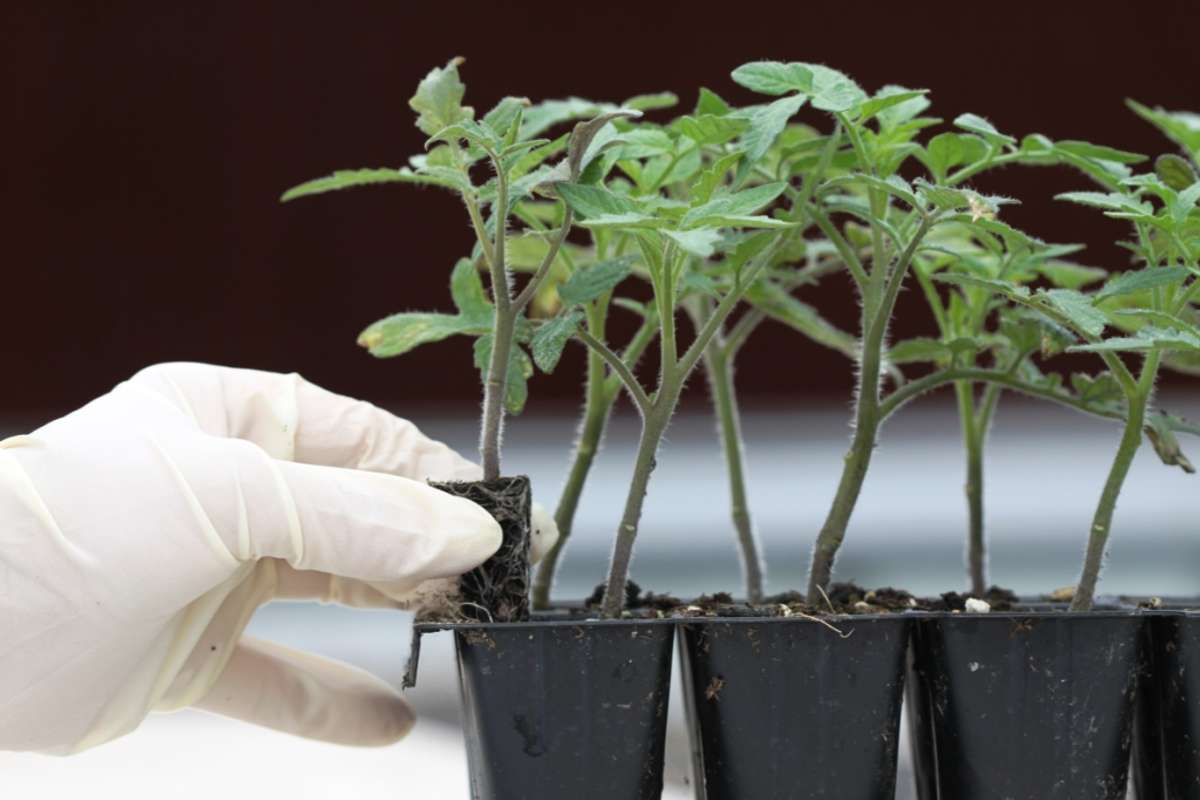
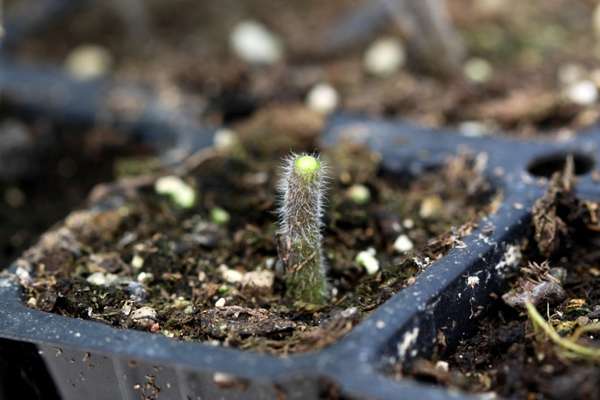
- After tomato seeds have germinated and seedlings have sprouted, be sure to choose the most healthy specimens for grafting, each with 2-4 true leaves (Figure 3). Using rootstock and scion seedlings with a similar stem diameter will help align the pathways (vasculature) at the graft union (Figures 3 and 4).
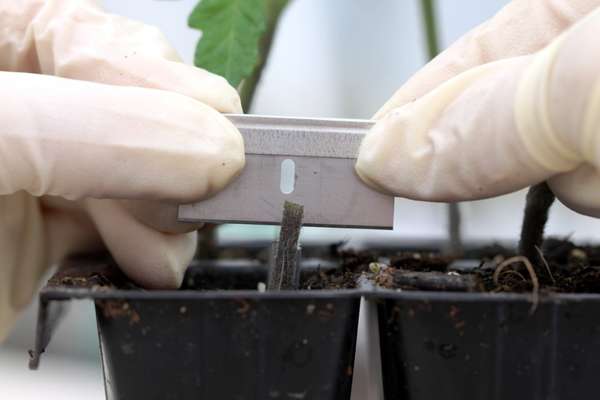
- Remove the upper portion of the rootstock seedling with one horizontal cut. The top of the rootstock has been removed and only the stem remains (Figures 5 and 6).
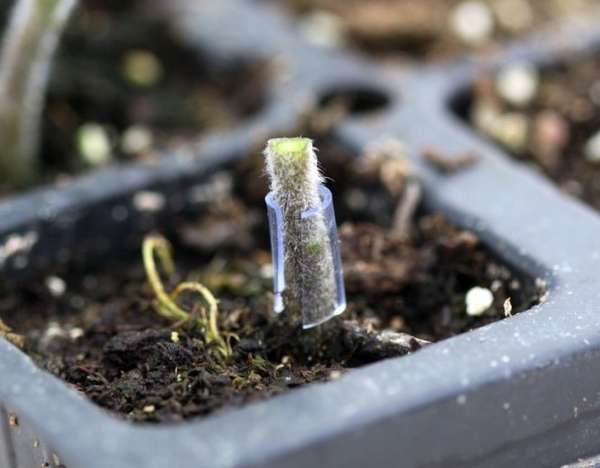
- Clips are used to secure grafts. If using a self-made plastic tube clip, place it on the remaining portion of the rootstock stem.
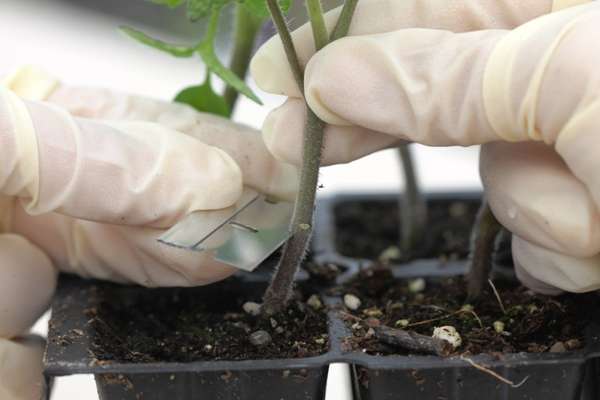
immediately after cutting and slide it down to the soil line (Figure 7). - Create a vertical cut in the center of the rootstock stump. In this image a cut approximately 4 mm deep is used, which corresponds to the notch on the razor blade (Figure 8).
Preparation of the Scion
- Remove the lower portion of the scion seedling with two cuts. De-root the scion with the first cut. Make the second cut at a point where the scion stem diameter closely matches the rootstock stem diameter (Figure 9).
- Trim off a few scion leaves to help reduce water loss. Leave only one or two small ‘leaflets’ (Figure 10).
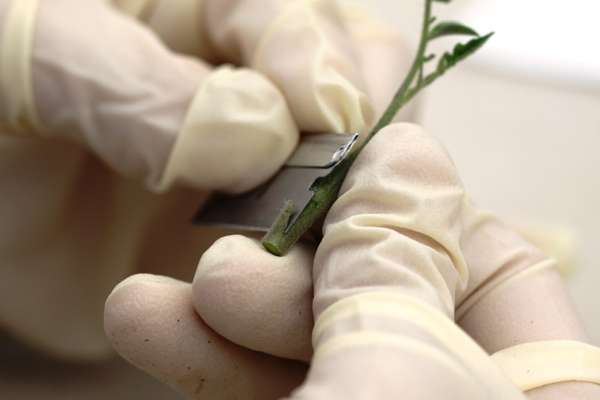
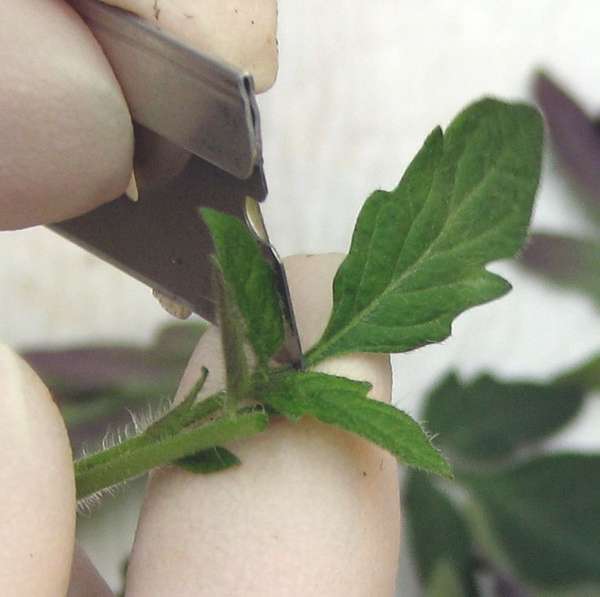
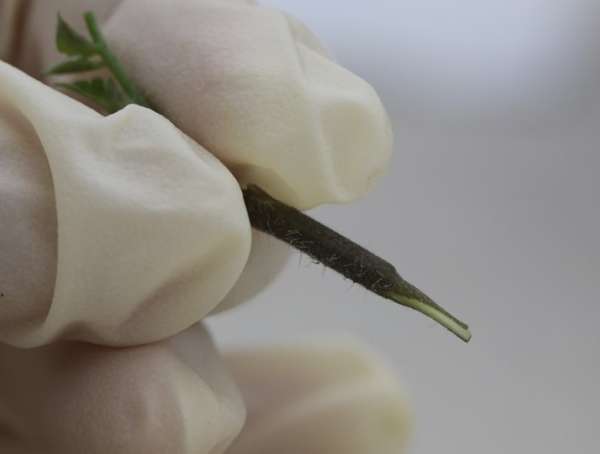
- Trim the lower section of the scion seedling stem to form a blunt wedge, making a single cut on each side of the scion stem. Take care to keep the cut surfaces clean, and do not touch them with your fingers (Figure 11).
Join the Scion and Rootstock Together
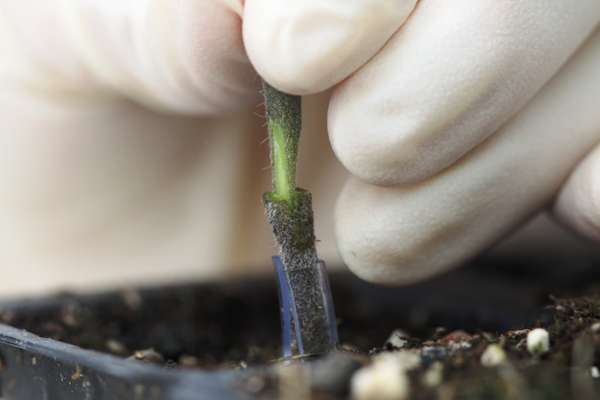
- Insert the wedge end of the scion into the bisected rootstock (Figure 12).
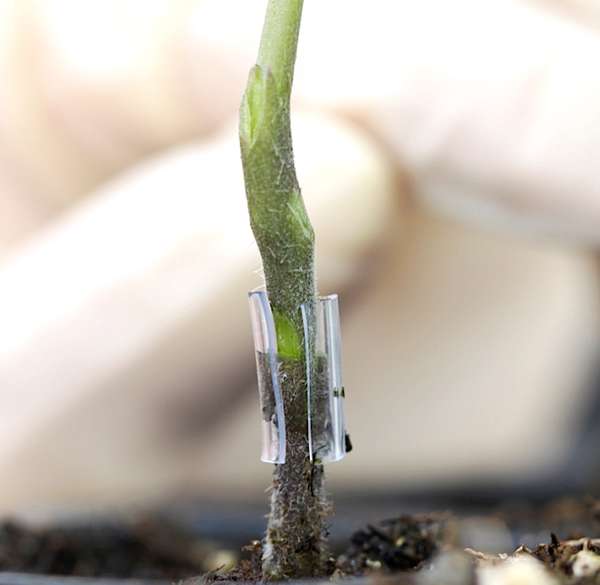
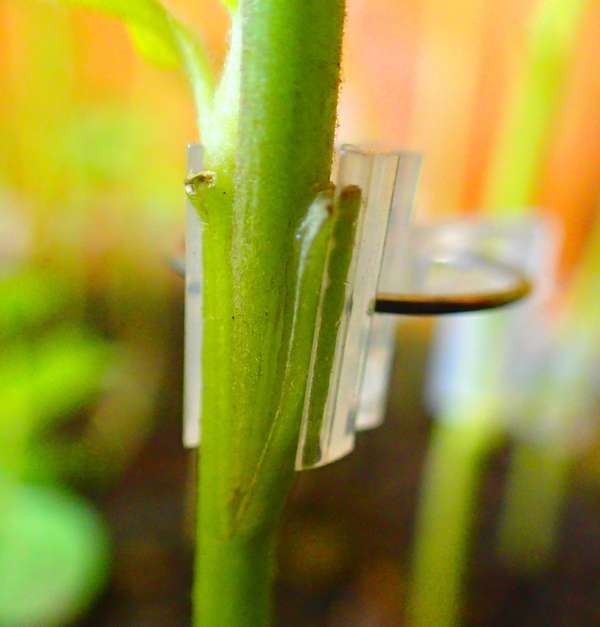
- Slide the plastic clip up from the base of the rootstock and position the clip around the graft union. A self-made tube clip is shown in Figure 13.
- If a commercial grafting clip is being used, apply it to the graft union at this time.
Aftercare of the Grafted Plant
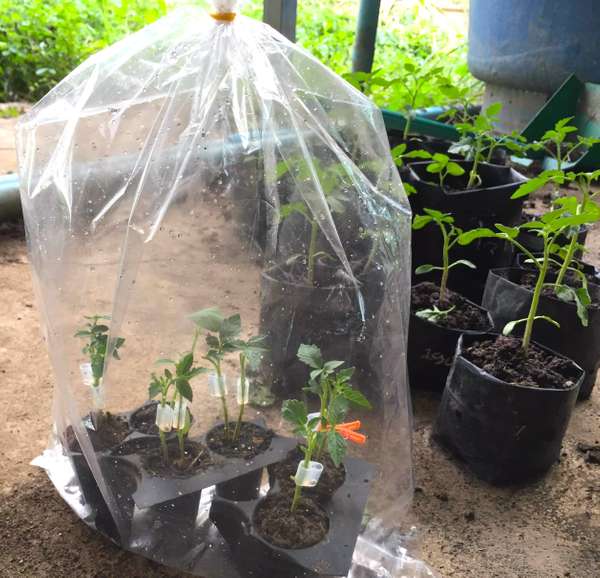
Place newly grafted plants (Figure 14) into a healing chamber as soon as possible after grafting. A healing chamber is a small covered structure designed to maintain high humidity and reduce light intensity to minimize heat build-up while the grafted plants heal (Figure 15). The primary purpose of the healing chamber is to minimize water loss from the scion. Clear plastic sheeting is used to retain moisture that evaporates from a water-filled pan or reservoir placed on the chamber floor. The chamber is covered with black plastic to reduce light penetration. Over-the-top shade netting can also be used to reduce light and allow for good air circulation. Light intensity can be controlled as needed by addition or removal of the shade netting. Placing the chamber under natural shade can also reduce the need for artificial shading. The size and design of the healing chamber depends on the scale of production of grafted plants. A small farm or home gardener can create a small healing chamber from a seedling flat, a plastic propagation dome, a plastic bag, or even a single plastic cup.
During the first week after grafting, the scion is unable to receive water from the rootstock. It is therefore important to maintain proper environmental conditions to prevent water loss from the scion and promote rapid formation of the graft union. It takes an average of 7–10 days after grafting for the rootstock and scion to establish vascular connection and up to 14 days for the graft union to fully heal, depending upon location and your ability to control temperature, humidity, and light (Figure 16).
During the first week of healing, maintaining relative humidity above 90% and temperature at approximately 21-27/29 °C, night/day appears to be optimal. The effects of light level are direct and indirect and must be considered carefully. Higher light intensity can benefit the healing process if humidity and temperature can be maintained at target levels. However, in tropical climates temperature and light level are usually high and shading is required to moderate the temperature and relative humidity.
From the second week of healing, humidity can be lowered gradually, while light levels should be increased by periodically removing the black plastic and/or shade netting. This process slowly acclimates the grafted plants to full sun conditions in the field.
Transplanting to the Field
Although the scion and rootstock establish vascular connection at approximately 7 days, it can take up to 14 days from grafting for the graft union to fully heal (Figure 16).
After removing plants from the healing chamber, allow them to acclimate in a shaded location protected from the wind for 5-7 days before transplanting to the field. It is also useful to expose them to a couple hours of direct sunlight prior to transplanting. Adjust this schedule if needed so as to not stress plants when introducing them into the field environment.
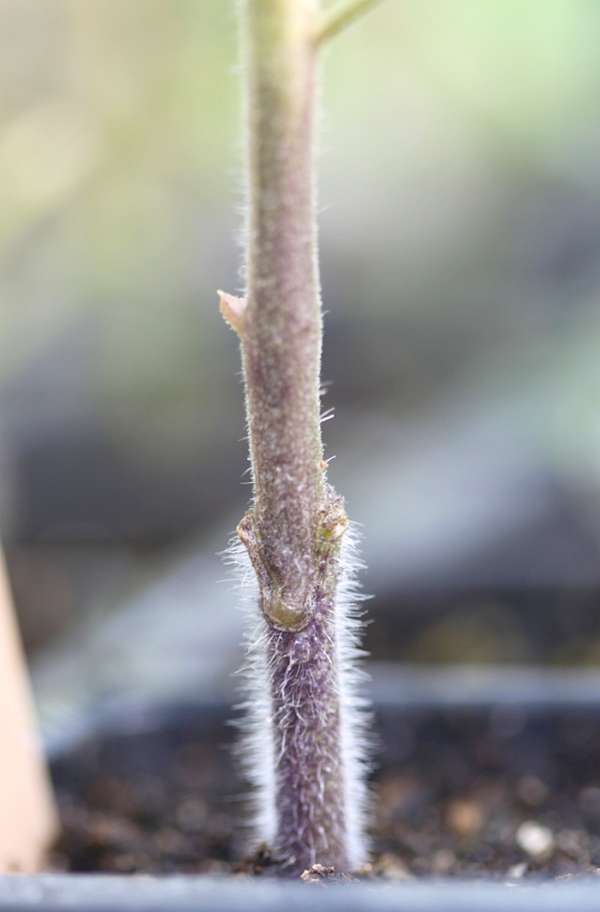
When transplanting, make sure that the graft union remains above the soil line (Figure 17). If the graft union is
buried, the scion will root into the soil and any advantages that would have been provided by the rootstock, such as resistance to soil-borne diseases, will be nullified.
Once the grafted plant establishes in the field and begins to grow, check for and remove any suckers that develop on the rootstock. Also remove any adventitious roots that develop on the scion. To prevent infection from soil-borne diseases, the scion tissue must not come in contact with the soil. Apply ample mulch after transplanting to reduce soil splashing onto the plant during rainfall or irrigation. Grafted plants should be staked two to three weeks after transplanting. It is very important that plants be tied securely to stakes. This will prevent vines from sliding down and the scion stem contacting the soil.

Conclusion
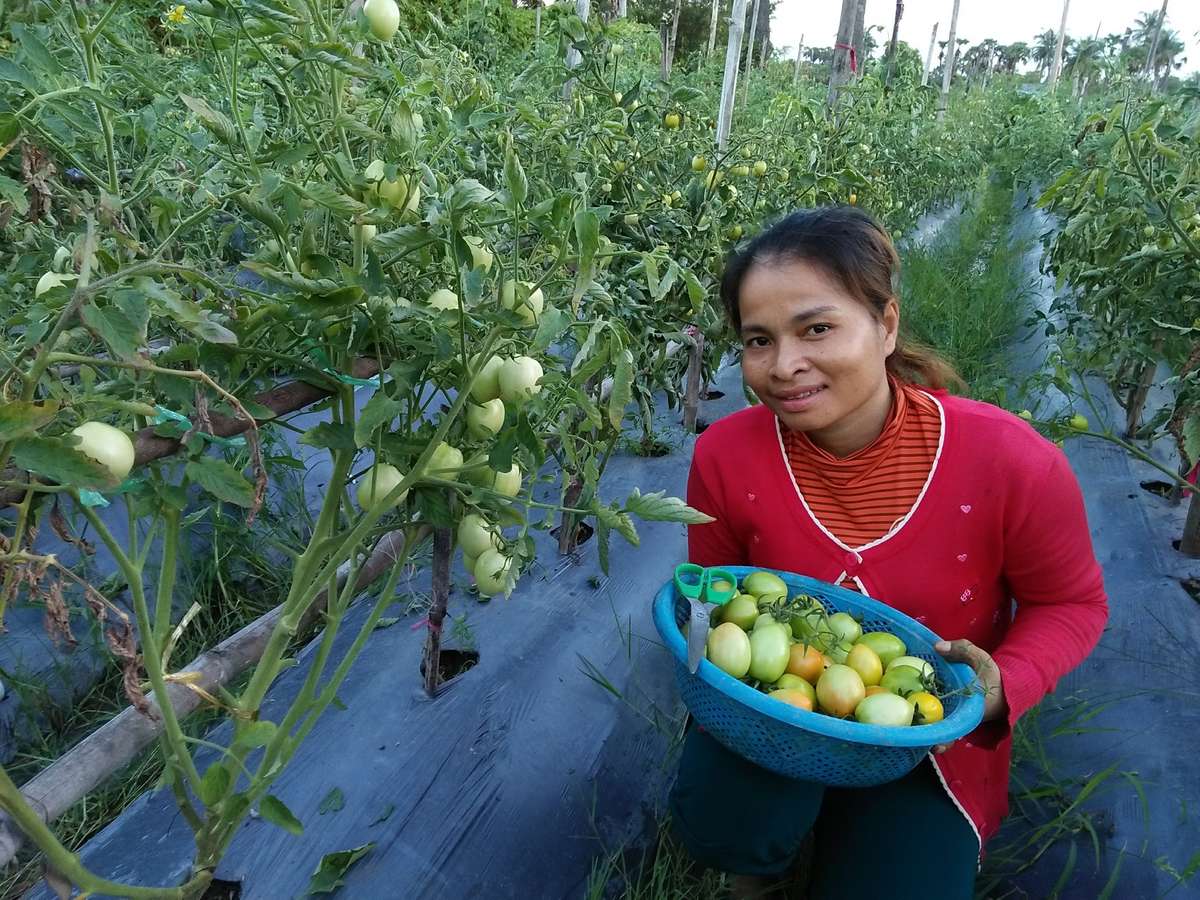
Small farm diversification is critical to creating resilient food systems, particularly in countries like Cambodia, that are highly susceptible to the ills associated with climate change. Vegetable grafting technology can be a useful tool to improve food security at one of the most challenging times of the year. Additionally, home vegetable production and marketing remains a female enterprise in Cambodia. Development of a ‘rainy season vegetable production toolkit’, including tomato grafting, promotes women empowerment via increased market access and participation (Figure 18). Grafted tomato production provides an entry point into lucrative local produce markets for smallholder women during the rainy season, and has the potential to improve both nutritional and economic outcomes. Added household income from increased market participation also holds the potential to directly benefit children by improving access to education, health care, and nutritious food.
References
Bates, R. 2018. Vegetable Grafting Basics – Presentation Slides. Myanmar Seed Saving Workshop. January 16-18, 2018. Pathein, Myanmar. Available: https://www.echocommunity.org/en/resources/15b2a737-5f6e-42ac-b105-8ae9d6476d48
Kleinhenz, M., Soltan, M., Short, S., and Hu, B. Grafting Guide: A Pictoral Guide to the Cleft and Splice Graft Methods for Tomato and Pepper. 3rd Edition. Ohio State University Extension.
Grafting: Galleries, Publications, Recordings, Tools. The Ohio State University, Vegetable Produc- tion Systems Laboratory. Available: http://u.osu.edu/vegprolab/research-areas/grafting-2/
Palada, M., Wu, D. 2013. Grafting Sweet Peppers for Production in the Hot-Wet Season. International Cooperators’ Guide. AVDRC – The World Vegetable Center. Taiwan. Available: https://www.echocommunity.org/en/resources/44ae893c-cb34-4815-bc1c-b19ad7bbf795