Intensively cultivated vegetable gardens can supply a great deal of a family's food from very little land. However, to maintain their productivity, these gardens require a lot of fertilizer and some special techniques, which are discussed below.
As one crop is finished, another is put in its place throughout the growing season. Without additional fertilizer the soil would soon be worn out. Cost of the garden can be kept low by using compost and a crop rotation system that also includes poultry or other livestock, which can give a steady supply of manure. This virtually eliminates fertilizer costs. The best way to ensure a large supply of manure is to keep the animals in a pen, barn, or corral, especially at night.
THE SOIL
Fertile soil includes organic matter and minerals. The best soil is loose and has a crumbly texture that breaks easily into small pieces a few millimeters in diameter. The deeper the crumb structure exists in the soil the better.
If the soil is compacted or dense, it can be loosened by first plowing or tilling to break up the soil. Tilling also controls weeds. This work can be done with a pick and shovel, a hoe, or a heavy fork. A small tractor, or animal drawn tools, may be helpful in a very large garden.
The soil can be improved by: 1) adding manure or compost, or by returning to the soil plant materials that you or your animals do not eat, 2) rotating crops, 3) working the soil only when it is dry enough. Test for dryness by taking a handful of soil and squeezing it. If it sticks together tightly, it is still too wet to work.
THE GROWING BEDS
Make planting beds no wider than you can reach to the middle of for planting, weeding, and harvesting. In that way you won't have to step on the beds and compact the soil. One meter (three feet) is a typical width. Lay the beds across any slope to slow water runoff and reduce erosion. The soil may be raised in long mounds so that it will warm more readily and be less subject to flooding. Edge the mounds with stone, brick, concrete block, heavy boards, or other material to hold the soil in place. This is not essential, but makes the garden easier to care for in the long run.
Leave a footpath between the beds that is wide enough to walk in and to allow some space for the tops of the growing plants. You will want to be able to work between the beds without damaging plants. Build a secure fence around the garden to keep out chickens, rabbits, cattle, and other animals.
If there is a stream or a tubewell nearby, the garden can be watered by running water in furrows between the beds, or by hand watering. Widely spaced individual plants, such as tomato, pepper, or eggplant, can be watered by burying a jar with a tiny hole near the bottom in the ground near the plant (Figure 1). The jar is filled
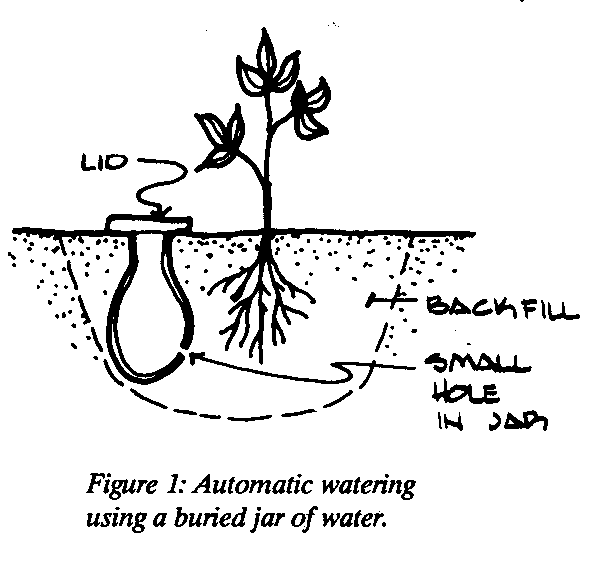
with water, which seeps out to be used by the plant as needed. This is quite a bit of work, but can be very effective in very dry areas. Bury the jar when you set out the plant so you don't disturb the roots later. Check the water level in the jar about once a week, oftener if need be.
FERTILIZING THE SOIL
Growing plants take nutrients from the soil, which must be replaced or crop yields will slowly diminish, and intensive cultivation uses up nutrients rapidly. The major nutrients are nitrogen, phosphorus, potassium, and calcium. These can be bought as chemical fertilizers, but are also found in plant matter and manure.
An inexpensive way to enrich the soil is to use compost from a compost pit or crib that is located near the garden (Figure 2). Pile the
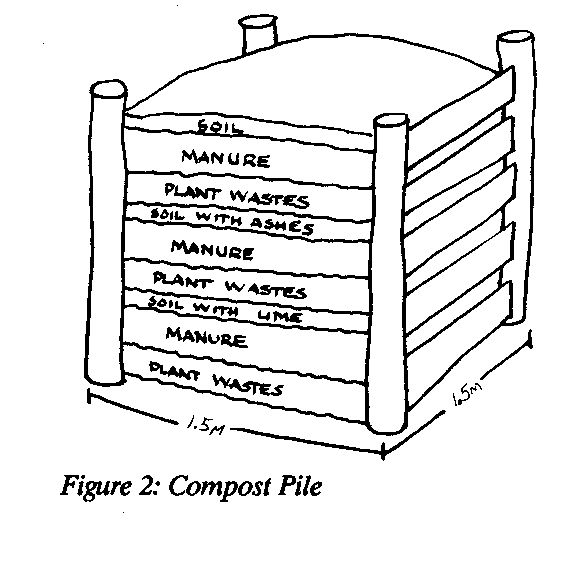
materials into layers as shown. Keep moist. Turn and mix every week or so as they decay. When the compost gets to be dark and crumbly, it is ready for the garden. Composting will not usually supply all the fertilization needed, but will add nutrients to the garden soil and improve soil texture.
The simplest way to fertilize and improve soil texture at the same time is to use animal manure. If you use fresh manure, spread it over the garden at the end of the growing season and work it into the soil. During the growing season, it is best to use only seasoned manure.
If only fresh manure is available, a small amount of it may be used to make a weak "tea" that can be poured around the growing plants. To make the "tea" put a shovelful of fresh manure into a bucket of water and let it stand for about a week. Dilute the liquid until it is the color of weak tea and use it to water your plants about once a week.
SELECTION OF CROPS
Select crops that suit the climate and your family's tastes. If you want to grow vegetables to sell, consider community tastes as well. Try to choose an assortment that will give you something fresh from the garden throughout the season. Unless you have some way to preserve the produce, don't plant more than you can eat, give away, or sell fresh. But do plant vegetables you like a lot or want in quantity at intervals of a couple of weeks so that you will be able to harvest them over a long period. Keep in mind that in a well-fertilized garden plants can be more closely spaced and will yield a larger harvest for the space.
Some crops may be planted directly in the beds while others are best started in a seed box and later transplanted into the garden beds. The table below gives a partial listing of both types of vegetables.
Seeds To Plant and Seedlings To Transplant
Vegetables that should Vegetable Seeds to Plant Directly in the Garden be Transplanted:
Broccoli Black Colocasia Okra Cabbage (roots) Onion Cauliflower Beet Pigeon pea Chinese cabbage Bitter gourd Pointed gourd Eggplant Carrot Potato (tuber) Indian spinach Collard Radish Lettuce Coriander Red Amaranth Mustard Cowpea Soybean Pepper Cucumber Sweet corn Spinach Field bean Sweet potato Tomato French bean (cuttings) Green Amaranth Sweet pumpkin Jute Sword bean Kohlrabi Turnip
It is a good idea to rotate the vegetables in the beds each season. That is, plant one type of vegetable one season, another type the next season, and so on. Each type or family of vegetable is subject to similar pests and soil diseases. Planting a different type vegetable in the beds each season helps prevent the build up of these pests and diseases and gives the soil a rest.
There are four basic families of vegetables--root vegetables, leafy vegetables, legumes, and fruiting vegetables - so the rotation would span four seasons.
Peas, beans, and such are legumes, which means that they can make their own nitrogen plant food and so enrich the soil. Plant vegetables that need a lot of nitrogen in the bed when the legumes are finished. Root vegetables are grown primarily for their thick fleshy roots--radish, carrot, onion, beet. The leaves of some root vegetables, like beet, are often eaten as greens. Fruiting crops include peppers, eggplant, tomato, and white potato.
Leafy vegetables - cabbages of various kinds, lettuces, spinach, collard--are grown for their leaves, which are rich in vitamins and minerals. Some leafy vegetables tolerate cold weather better than others and some do well when it is hot, so it is possible to have some kind of fresh greens from the garden almost all year round. When you are planning your crop rotation, include broccoli and cauliflower in the leafy group, even though you don't eat the leaves, because they are attacked by some of the same pests as the leafy vegetables.
Plan the beds so that as one crop is finished another takes its place (with the addition of a little compost or seasoned manure). Save space by planting vines like beans and cucumbers on trellises at the edge of the garden, situated so they don't shade other crops. Stake tomatoes, peppers, etc., with posts of bamboo or whatever is available to keep the fruit from rotting on the ground.
MULCH
Cover the soil around seedlings with a thick layer of grass clippings, leaves, straw, or other material. Some people use black plastic, which is expensive, or even layers of newspaper. The idea is to keep the soil from drying out so fast and to keep weeds from sprouting. Mulching may seem like a lot of extra work in the beginning, but it saves a lot of work over the season. It also saves water, and the organic mulches, like grass and straw, enrich the soil as they decay.
Sources:
Paul J. Abrahams. VITA Volunteer, Atlanta, Georgia J.W. and J.B. Fitts, VITA Volunteers, North Carolina Harlan H.D. Hatfield, VITA Volunteer, Bend, Oregon James M. Corven, VITA Volunteer, Washington, D.C.
Silage for Dairy Cows
The small dairy farmer who maintains five or six cows on two or three hectares (four or five acres) of fodder and pasture grass is usually faced with a serious decline in milk production during dry or cold periods. The decline in milk production is nearly always the result of the seasonal scarcity of fresh, succulent, nutritious feed. Without good feed, cows are obliged to eat dry, strawy, weedy grass, which not only lacks nutritive value, but often causes digestive troubles, constipation, and difficult birth. These troubles can be dealt with easily and cheaply; good health and a high level of production can be maintained-by the use of silage.
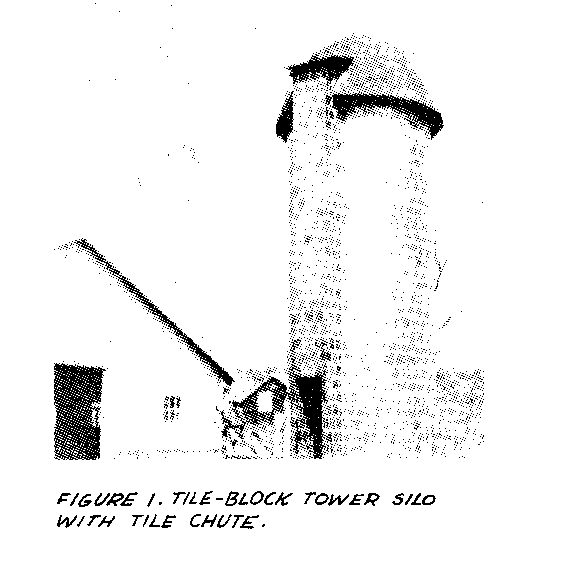
Silage can be stored in permanent or temporary silos. Permanent silos can be either upright tower-shaped structures (see Figure 1) or
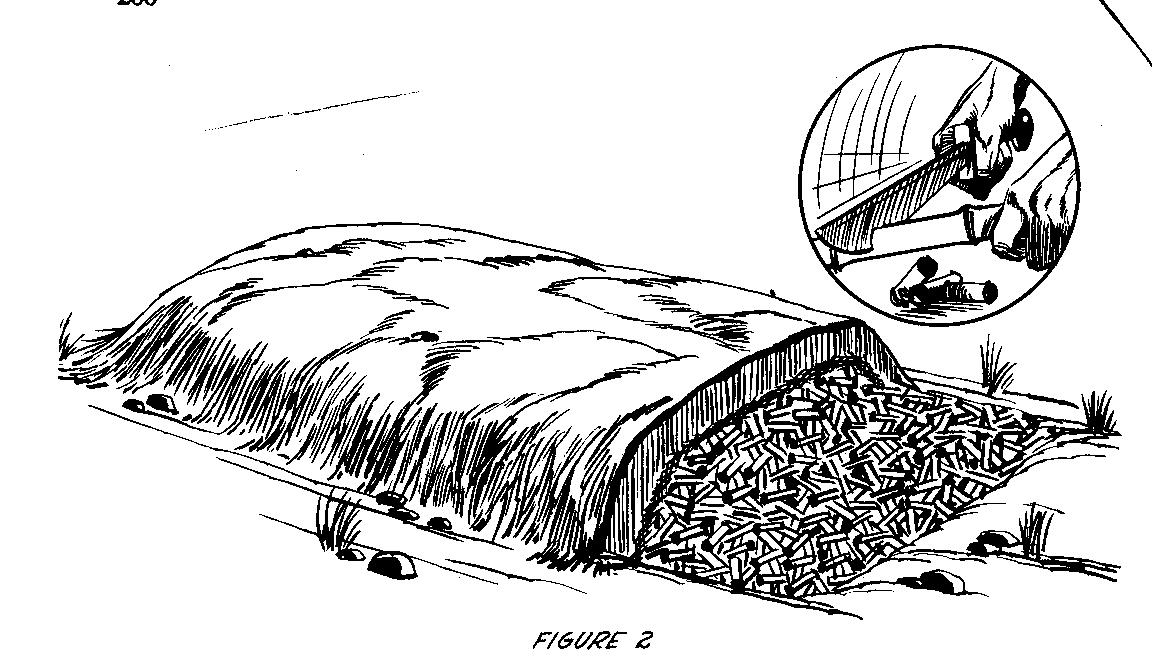
horizontal, like the trench silo (see Figures 2, 3, and 4). Upright stack
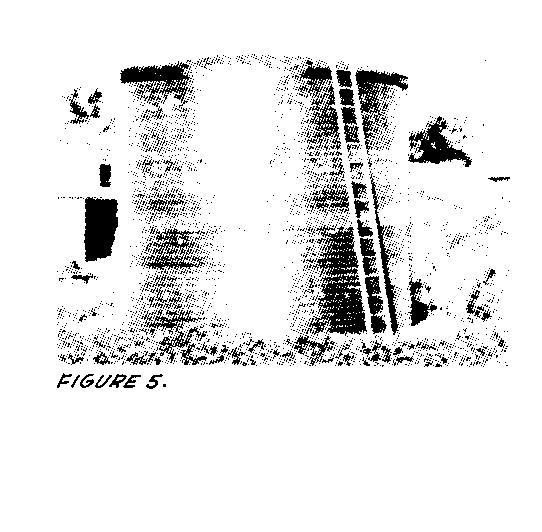
silos (see Figure 5) and fence silos
are examples of temporary silos. The use of successive rings of fencing is becoming widespread; these silos can be lined with plastic or paper or they can be unlined. Many farmers have saved the money needed for permanent silos by using temporary silos for several years.
Losses of silage vary with the type of silo, the crop ensiled, its stage of maturity and moisture content, fineness of chopping, and the extent to which air and water have been excluded from the silage. Losses run from 5 to 20 percent in permanent upright silos; from 10 to 30 percent in permanent horizontal silos; from 15 to 50 percent in temporary trench, fence, and stack silos.
A silo should be located near the barn to keep to a minimum the time and labor involved in feeding.
Detailed instructions on silo building are given "Farm Silos," Miscellaneous Publication No. 810, Agricultural Research Service, U.S. Department of Agriculture, 1967 (revised).
It is not worthwhile to make a silo of less than four tons capacity, except under very special conditions. Spoilage in smaller silos is often excessive. A cow of average size not provided with any other fodder will consume about 23kg (50 pounds) of silage in 24 hours; on this basis a farmer knowing the number of cows to be provided for and the approximate length of the period during which silage is to be used, may estimate the quantity needed; for example:
20 cows @23kg (50 pounds) per day for 90 days 41,400kg (90,000 pounds) 5 heifers @14kg (30 pounds) per day for 90 days 6,300kg (13,500 pounds) 5 calves @7kg (15 pounds) per day for 90 days 3.150k (6.750 pounds)
50,850kg (110,250 pounds)
51 metric tons (56 short tons)
The bare requirements would be 51 metric tons (56 short tons) of silage, and an allowance for wastage should be added. The tables may be used to estimate the dimensions of a silo.
A silo of ten tons capacity or less should be filled in two operations, that is, on two separate days with two or three days between operations. Similarly, a large silo should be filled in proportionate operations, though this is not so essential as with the smaller size.
Table 1 gives trench silo capacities.
Approximate Kilograms "Dimensions in Meters (Feet) (Pounds) of Silage Per Top Width Bottom Width Depth 30cm (1') of Length
2.4 (8) 1.8(6) 1.8(6) 756 (1680) 3 (10) 2.1(7) 1.8(6) 918 (2040) 3.7(12) 2.4(8) 1.8(6) 1080 (2400) 2.4 (8) 1.8(6) 2.1(7) 882 (1960) 3 (10) 2.1(7) 2.1(7) 1071 (2380) 3.7(12) 2.4(8) 2.1(7) 1260 (2800) 3 (10) 1.8(6) 2.4(8) 1152 (2560) 3.7(12) 2.4(8) 2.4(8) 1440 (3200) 4.3(14) 3 (10) 2.4(8) 1728 (3840)
Material for silage varies considerably. Corn, guinea corn, sugar cane leaves, uba cane leaves, napier grass, guatemala grass may be used singly or in mixtures; the important point to be borne in mind is that the material should be young, fresh, and green. Uba and sugar cane should be cut before the stem is formed; guinea grass should be cut before flowering and seeding takes place; napier, guatemala, and elephant should be cut while the stems are still tender and green. If only fresh, leafy growth described above is used, there is no need for chopping the material as it is brought to the silo. It should be scattered thinly over the entire surface of the silo, and should be constantly trampled to cause consolidation. Trampling close to the walls is especially important.
Silage that is considerably more nutritious than grass silage can be produced by combining fresh young leguminous fodders with grass when filling of the silo. Cow peas, edua peas, soya beans, Bengal beans, and St. Vincent plum fodders have been used with success at the level of 20-25 percent of the total bulk. This material must be chopped.
The use of molasses is recommended in all silos, for increased palatability, increased nutritive value, and in the case of young grasses, or silage with leguminous mixtures, as an aid to the essential fermentation. Molasses should be used at the rate of 10kg per metric ton (20 pounds per ton) of grass material, as follows: if the material is wet with rain or dew, add two parts of water to one of molasses before application; if the material is dry, add four parts of water to one of molasses. As each layer of material, several centimeters or a few inches thick, is laid down, sprinkle on the molasses-water mixture, unless a blower with a continuous molasses sprayer attached is used. In leguminous mixtures 25 percent more molasses should be used.
Inside Diameter Depth of Silage in Meters of Silo in Meters 2.4 3 3.7 4.3 4.9 5.5 6.1 6.7 7.3 7.9 8.5 9.1
3 9.9 12.6 15.3 18 20.7 23.4 25.2 28.8 31.5 35.1 37.8 42.3 3.7 14.4 18 21.6 26.1 29.7 34.2 36 40.5 45 49.5 54.9 60.3 4.3 18.9 24.3 29.7 35.1 40.5 45.9 48.6 54.9 61.2 67.5 74.7 81.9 4.9 25.2 31.5 38.7 45.9 53.1 61.3 63.9 72 81 88.2
Table 2. Number of metric tons of silage in a vertical silo.
When it is not possible to obtain young, fresh material, and older material must be used, then chopping is essential. Once the material has been chopped the remaining operations are similar to those described above, with the exception that only 6kg of molasses need be used per metric ton (12 pounds per ton) of grass material plus 35 percent more if legumes are included.
After a silo has been filled level with the top and has been thoroughly trampled, the silage will settle gradually over a period of several days, bringing the need for refilling once or perhaps twice to compensate for shrinkage. After the final refill a thick layer of dried grass should be laid over the silage and trampled down; finally, a few heavy logs laid over the dried layer will assist consolidation. A pointed roof over the silo with eaves reaching down below the rim will shed rain water.
Silage made in the spring of the year when grass is young and nutritious will keep perfectly until the winter or drought period comes; then it is possible to supply cows with feed every bit as nutritious and as palatable as fresh grass in the natural state. It is true that some cows do not take naturally and readily to silage, but they may be taught to consume it with relish.
When a silo is opened to feed cows, logs and the dried grass layer should be removed. It is commonly found that a layer of silage several centimeters (a few inches) thick from the top downward will have spoiled--turned black or slimy with white streaks of fungus here and there. This should be thrown away.
The color of the good silage exposed below may be green, yellow-green, or brownish-green, and it will have a strong pleasant smell; there will be no sliminess or streaks of fungus. The silage may be fed at will to cattle, care being taken only that each day's supply should be removed from the whole surface of the silage rather than from one spot; in this way an even surface will be maintained and no one section will be over-exposed to air. After each day's supply has been taken out, the surface of the silage should be covered with old bags to prevent drying out; if it should become necessary to interrupt the feeding of silage for more than a day or two, then the silage must be sealed off as it was when the silo was first filled.
WARNING - GAS DANGER IN SILOS
Suffocating and, in some cases, poisonous gas may be present around silos. Suffocating gas from fermenting silage, mostly carbon dioxide, forms in all silos shortly after filling begins and continues until fermentation stops. Poisonous gas, when present, is nitrogen dioxide. Its color and density vary with temperature. At room temperature it is orange yellow and 2 1/2 times as heavy as air. As the temperature rises, its color becomes darker and its density becomes lighter. The gas, being heavier than air, collects and remains in any depression or enclosed space when there is no strong, free movement of air. Danger of nitrogen dioxide gas occurs only during filling and for about a week after.
Many lives have been lost because of carelessness in entering a silo where there may be danger of gas. Gas is a particular hazard in below-ground silos. To stir the air in a silo, tie a rope to a basket, a blanket, a large piece of canvas, or a tree branch and then drop the article into the silo and raise it a number of times with the rope.
Source: The Farmer's Guide. Marvin D. Van Peursem, VITA Volunteer, Newton, Iowa. Kingston, Jamaica: Jamaica Agricultural Society, 1962.