Introduction
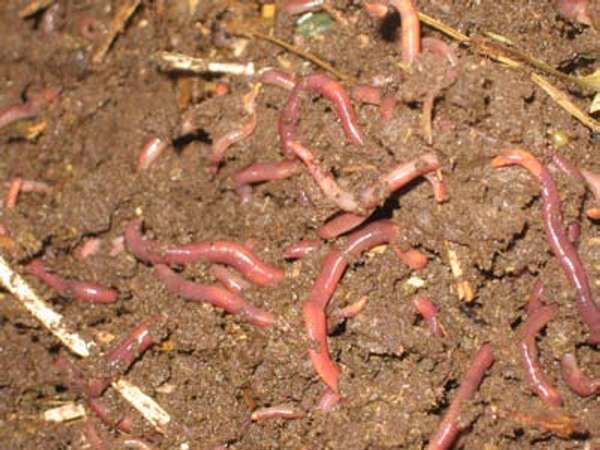
Redworms (Eisenia fetida). Source: ECHO staff
Worm or vermiculture is a useful technique for recycling kitchen and livestock wastes into a rich organic fertilizer, for producing high-protein feed for poultry and initiating a lucrative business selling worms and worm castings for the small farm. Worms are invaluable partners in building the soil in your garden, be it a kitchen or dooryard garden or a large market garden.
In the garden, healthy soil is essential for the production of healthy crops, and healthy soil requires a good quantity of organic matter. Organic matter can be added to the soil from a number of sources (See ECHO Tech Notes, Compost and Mulch for Healthy Soil, Green Manure Cover Crops and Soil Fertility) It is essentially comprised of decomposed plant and animal wastes, and these wastes are ideal for feeding and maintaining the “living” or biological portion of the soil and giving it good “health.”
In this publication we examine the use of worms for the production and application of organic matter for the small farm.
Setting Up the Worm Farm
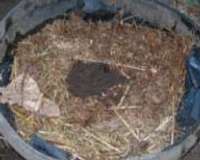
Household bin in Honduras. The Bin is 23-30cm (8-12 inches) deep. Source: Larry Yarger
To establish your worm farm, you will need the following resources:
- A bin or other suitable container
- Bedding material
- Worms
- Food source
Choosing a Worm Bin
A standard household worm bin is a shallow box made from plastic or wood. You can use an old dresser drawer, tire, barrel, plastic tote or custom-made bin for your worms. The container should be 20-30 cm (8-12 in) deep, and provide one square foot (~0.1 m2) of surface area for every 500 g (1 lb) of food waste produced and fed per week. A bin with the surface area of 1 square meter requires 5 kg (11 lb) of waste per week to feed the worms.
A bin about 30 cm (1ft) high by 60 cm (2 ft) wide by 1 m (3.3 ft) long, together with about 6000 worms will be able to process about 2.5-5 kg (6-11 lbs) of waste weekly.

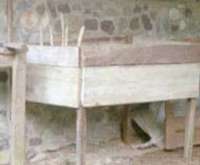
Commercial (concrete) bins in Nicaragua. Source: Larry Yarger
Make sure there is good drainage in the container so the worms don’t drown. Especially if the bin is made of plastic or metal, it will need a system for moisture release or collection. If possible, design a way to capture the runoff which can be used as liquid plant fertilizer. Cover the bin to conserve moisture, provide darkness for the worms and protect them from predators and rain. Wooden containers are absorbent and good insulators for the worms.
Locate the bin in a convenient spot. Small units will do well in or near the kitchen, and there will be no odor produced by a properly maintained bin. Larger units will do well under the shade of trees. Larger worm bins may be constructed of concrete, wood or metal and can be several meters in length. There are some elaborate designs produced commercially, but for the small farm, it is wise to keep it simple.
Preparing the Bedding
Worms need a cool and moist area where they can retreat if their decomposing dinner should become too hot. Shredded newspaper, tree leaves, dry grass or hay, chopped straw, coconut coir, seaweed, sawdust, compost and aged manure make nice bedding. A variety of materials provides additional nutrients for the worms, as they will also consume their bedding. This also produces richer compost. Fine sand or soil may be added to the bedding to provide the worms with necessary “grit” in their diet.
Shredded newspaper, tree leaves, chopped straw, dry grass or hay, coconut coir, seaweed, sawdust, compost and aged manure make good bedding materials.
If not already moist, soak the bedding in water to give it a consistency of a “damp sponge.” Fill the bin with the bedding mixture. Gently lift the bedding to help provide aeration and control odors.
Adding the Worms
Eisenia fetida, also known as redworm, red wiggler, tiger worm or manure worm (among others) is the preferred worm species for composting because these worms thrive on organic materials such as food scraps and manure. Other worm species, such as the night crawler will also work, although the red wigglr has been shown to be the best, by virtue of its voracious appetite and its vitality in captivity. You can find them in a friend’s worm bin, a local bait shop or in a frmer’s manure pile. Other worms can be found under rocks, logs, piles of leaves and compost. Be careful, though. In the dry season, they will migrate deep into the earth and be hard to find. You can “call” them however, by moistening the ground and covering it with leaves or straw, giving the worms a cool refuge to visit.
Grass Bedding in a tire. ~1000 worms are placed in the center, food is placed around them. Source: Larry Yarger
It is estimated that there are approximately 2200 adult redworms per kg (1000 per lb). When stocking new bins, start with ~1000 worms (1 lb) per cubic foot of bedding space. If your bedding is 20-30 cm deep (8-12 in), calculate 1 lb worms per square foot of soil surface area. To consume and convert 1 kilogram of waste in a week you will need approximately 2 kilos of worms (approximately 4000 worms). If you don’t have that many worms to start, don’t worry. It will just take a bit longer to consume the waste. Meanwhile, the worms will multiply. Given proper conditions, they will double their population in 2-3 months.
There are many ways of adding the worms, and all will work. There is no one precise method that must be used. In the photo, worms are placed in the center of the tire on top of the moist bedding. A slurry of manure is then poured around the worms in a circle. The worms migrate to the manure to feed, and eventually it makes no difference how you put the slurry in. The worms find it and are happy.
In a chicken/worm program in Nicaragua, Jeremy Palmer raised worms in long, wooden bins. The worm feed was cow manure, and the bedding was cow manure. To harvest, they emptied one half of a bin, poured the worms and castings onto a tray for the chickens to feed and collected the worm castings. He then filled the empty side with fresh manure slurry. The worms soon migrated to the new feed source.
Warning: If the environment is NOT to the worms’ liking, they will leave! They don’t like it too wet, too dry, or too hot.
Feeding the Worms
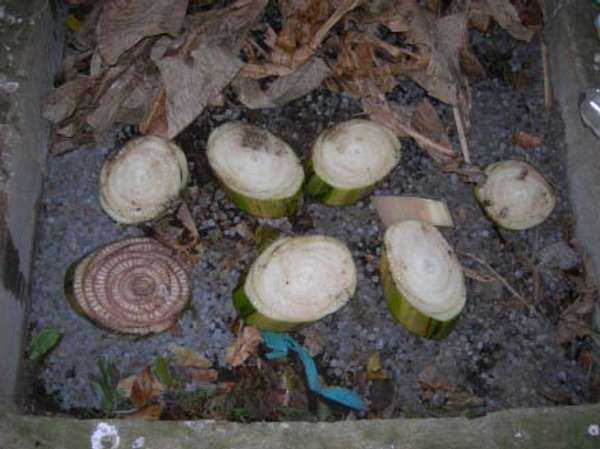
Diet of rabbit manure and discs from banana stalks. Source: Larry Yarger
There are basically 2 methods of feeding and raising worms. One is the batch method; the other is the continuous feed system. Your choice of feeding system will determine how you raise your worms.
Your worms will eat food scraps such as fruit and vegetable peels, pulverized egg shells, tea leaves and coffee grounds. They will also eat meat and dairy products, but if you have rat problems, it is recommended not to feed these.
Batch Method. In this system, completely fill the container with the food the worms will eat, whether animal or plant waste. Add the appropriate number of worms, cover and then allow them to go to work. Within 2-3 months they will have consumed the food and transformed the waste material into rich vermicompost, ready for use in the garden as soil amendment, organic compost or planting medium.
Continuous Feed Method. This system is similar to a standard compost system where you carry out the compost daily and add it to the compost pile or bin. The difference here is the bin contains worms to consume the compost. With the continuous feed system, you can decide when best to harvest your worms and castings.
In small bins burying food scraps under the bedding helps control odors. On a larger scale, kitchen and animal waste can be layered on top and the worms will feed from beneath.
Worm Castings and Vermicompost
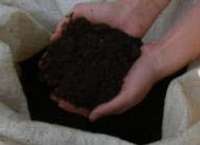
Worm Castings. Source: Larry Yarger
Worm castings or vermicompost is the primary goal of vermiculture. Technically, the castings are pure worm waste and are a very fine and nutritious organic soil amendment. Vermicompost on the other hand, is comprised of the castings, bits of bedding and other organic matter. Essentially, though the terms are used interchangeably, they are both worm manure and are valuable for improving the soil in most garden settings.
After approximately 2-3 months the contents of the bin will begin to look like rich black soil rather than the bedding that it started as. Move the entire contents of the bin to one side; fill the empty side with new bedding and begin to bury your food waste in the new bedding. Within a short time the worms will migrate to the new food source, and you will be able to remove the worm castings from the other side of the bin. Over time, you will be able to skim the castings off the top of the bedding without disturbing the worms.
If you want to harvest all the compost at once, dump the entire contents onto a large tarp or sheet and separate the worms out manually. Or, you can put the whole lot into the garden. Watch out for the tiny, lemon-shaped worm cocoons which contain up to 20 baby worms. Mix a little of the finished compost into the bedding of the next bin.
On a large scale using the batch method, once the food has been converted into castings, you can remove any extraneous food bits and allow the bin to remain several days to a week without feeding. This will cause the worms to clean up and grow hungry. After 3-7 days, place a bit of food scraps or manure into one corner of the bin. Within 2-3 days the worms will have migrated to the new food source, and you will be able to remove the worms from the bin and harvest the castings.
Utilizing the Worm Castings
As with compost and most manures, worm castings may be used as a soil amendment, organic fertilizer for transplants (place into the transplant hole before adding the plant), or a mulch around the plants growing in the garden. It may also be used as soil for potting or for seeding transplants that will later be moved into the field or garden.
For poultry feed, empty the portion of castings and worms onto a large tray and allow the birds to feed. When the worms have been eaten, you may remove the compost (worm castings) for use elsewhere. Use the finished compost as soil conditioner for the garden, potting soil or as a commodity to sell in the market!
Liquid Effluent
In the worm and casting production process, there is often a liquid effluent that may be drained off and used as a liquid fertilizer. If your bin is open to the soil this liquid will drain directly into the soil. But should you desire to utilize this by-product, construct your bins to collect it. Remember that worms don’t like an environment that is too wet or too dry; they will do their best to escape!
Some Useful Resources
Worms Eat My Garbage, by Mary Appelhof. 1997. Flower Press, Flowerfield Enterprises, LLC. Kalamazoo, Michigan, USA. 163 pp.
Earthworm Breeding for Profit, by David Lambert. 1983. Weston and Co., Kiama, Australia. 33 pp.
The Worm Book, by Loren Nancarrow and Janet Hogan Taylor. 1998. Ten Speed Press, Berkley, California, USA. 150 pp.
Raising Earthworms for Profit, by Earl B. Shields. 1959, 1975. Shields Publications, Box 472, Elgin, Illinois, USA. 127 pp.
Income and Other Benefits from Using Worms to Make Compost, by Dawn Berkelaar. In ECHO Development Notes, Issue 104, 2009. ECHO, 17391 Durrance Rd., North Fort Myers, USA.
Cite this article as:
Yarger, L. 2010. Vermiculture Basics & Vermicompost. ECHO Technical Note no. 66.