In areas without electricity, lanterns, candles, and cooking hearths often provide the only source of light at night. Candles are easy to make at home for home use. With attention to quality control, they can be made in a small workshop for sale in the shops and markets.
The directions given here are for dipped candles, which are made by repeatedly dipping a length of wick into melted wax until the candle is the desired size. Dipped candles often cost more in the shops than other kinds, but they usually burn longer and with less smoke. This system, developed by the Environmental and Development Agency in South Africa, uses a special jig that holds up to four candles at a time.
Tools and Materials
Paraffin wax (you may wish to experiment with bee's wax if it is available) Stearic acid Candle wicking (the string inside the candle) Container to melt the wax (this has to be as deep as the candles are tall) Wire for the jig Thermometer, in a brass case Rod or rope to hang the candles on while they cool A gas or kerosene stove
It is suggested that a small business or candle making cooperative would likely need to make an initial investment in 40kgs (88 lbs.) of wax, stearic acid in quantity to make a ratio of 10 parts wax to 1 part stearic acid, and 20 wire jigs.
MAKING THE JIGS
A jig is the hanger that holds the wicking while you dip it into the melted wax. Make 20 or so jigs for your business. Even working at home it is convenient to have a half dozen.
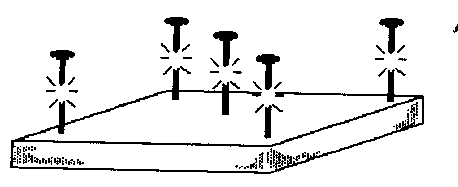
To make the jig, hammer 5 nails into a piece of wood as shown and cut off the heads.
Cut one piece of wire 60cm long and one piece 50cm long.
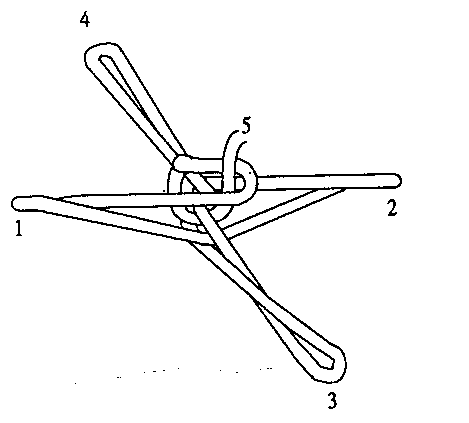
Take the shorter piece of wire and wrap it around the nails as shown in Figure 1.
Start at nail 1, bend the wire around nail 2 and then up around nail 3. Then bend it back to nail 4 and up around nail 5. Take the wire off the frame. This is the bottom of the jig. <see figure 2>
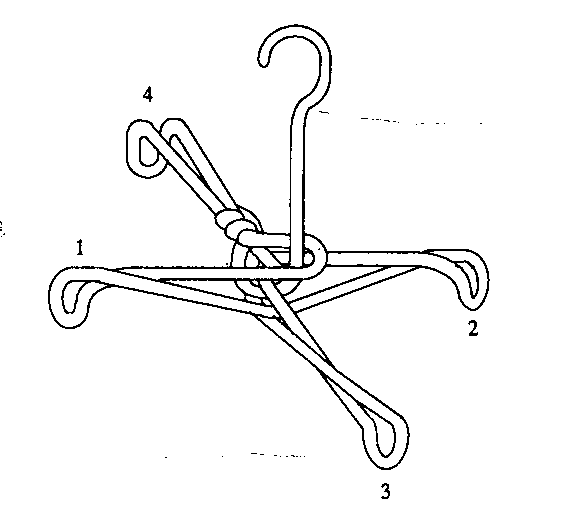
Make the top of the jig with the longer piece of wire. Bend the wire around the nails as described above. You will have some left over. Bend this part into a hook to hang up the jig with. Take the wire off the frame and bend down the corners as Shown in Figure 3.
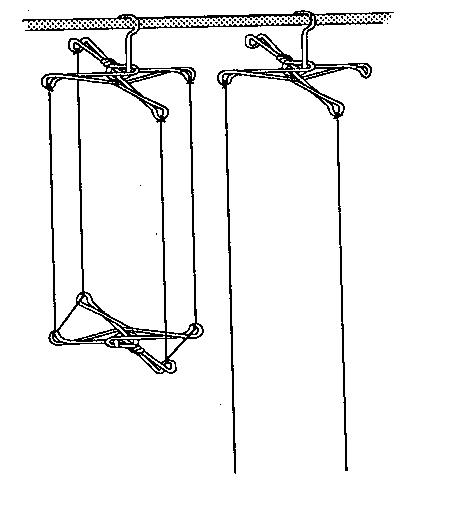
Take 4 pieces of wicking, as long as you want your candles plus a little bit. Tie one end of each piece to the top part of the jig and the other end to the bottom part (Figure 4). Fix as many jigs as you think you will need at one time.
PREPARING THE WAX
Cut the wax into small pieces. Make sure no dirt gets mixed up with it. Melt enough wax and stearic acid to fill the container almost full. Use 1 part stearic acid to 10 parts wax.
Heat the wax to 70[degrees]C (158[degrees]F). Use the thermometer to check the temperature. This is very important. If the wax is too hot it won't stay on the candle and if it is too cool the candle will be lumpy.
The safest way to melt the wax is to set the container with the wax into a pot of water so that the wax is not directly over the flame. It is very dangerous to let the wax get too hot. Wax catches fire easily, and a wax fire is difficult to put out. In case of fire, cover the container and turn off the stove as quickly as possible. Be careful not to splash the hot wax It will catch fire if it falls into the flame and it will burn your skin if it touches you.
DIPPING THE CANDLES
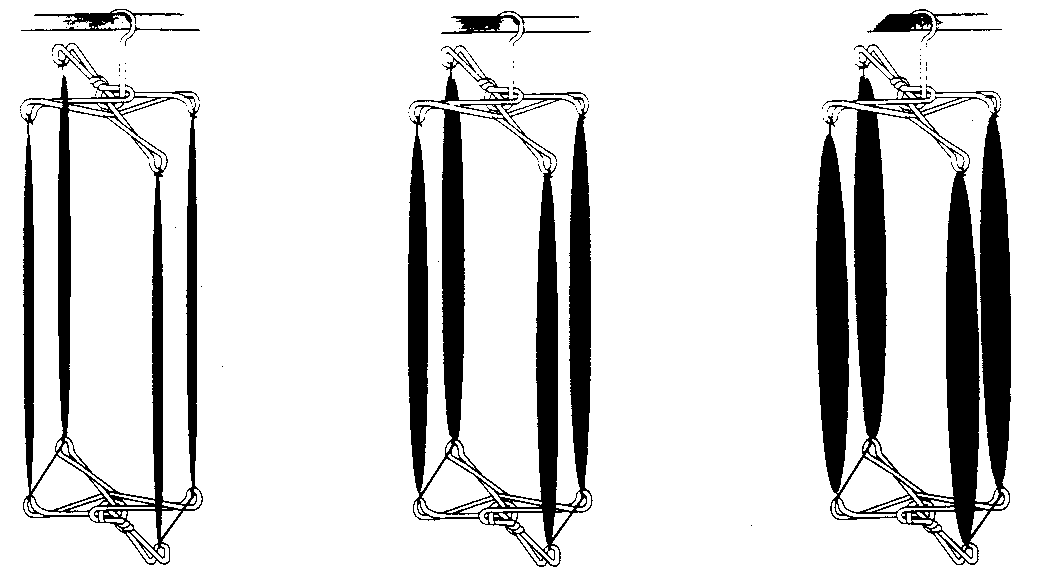
Take one of the jigs you have put the wicking on and dip it into the melted wax. Hang the jig on the rod to cool. Dip another jig with wicking into the melted wax and hang it on the rod. When you have dipped all the jigs you have prepared, start with the first one and dip again. Each time you dip the jig a little more wax will stick to the wick and the candle will get thicker. Continue dipping until candles are the size you want. <see figure 1>
Don't handle the candles until they are cool and hard. Then, cut them off the jigs. Trim the wicks to an even length. Store candles out of the sun and away from heat.
Put a wide board or plastic sheet under the rod where you are hanging the jigs. Any excess wax will drip onto them and you can scrape it off and melt it down again. Be sure to keep this area clean; any dirt that gets in the wax will get into your candles. The wax that sticks to the metal jigs can also be scraped off and used again.
Do not dispose of excess melted wax by pouring it down a drain. When it cools and hardens it will clog the drain. Besides, any extra wax can be melted down and used again. If you find that you have to get rid of a batch of wax, let it harden and then throw it away.
If the market is good and you can get the materials, you may want to try scenting your candles with essential oils like vanilla or sandalwood. Or you might try making colored candles. These oils and pigments must be specially made for use in candles, however, and are not always available.
Source:
Berold, Robert, and Caine, Collette (eds.). People's Workbook. Johannesburg, South Africa: Environmental and Development Agency, 1981.
Simple Methods of Candle Manufacture. London: Intermediate Technology Publications, Inc., 1985.